Building the Rapid-Response Cyberdeck with CrowView Note and CrowPanel HMI
A field-ready RF monitoring station that deploys in seconds. No soldering, no 3D printing, no mess.
Sponsored Content: This article is sponsored by Elecrow. Elecrow provided the CrowView Note and CrowPanel for this build. All opinions and analysis are my own.
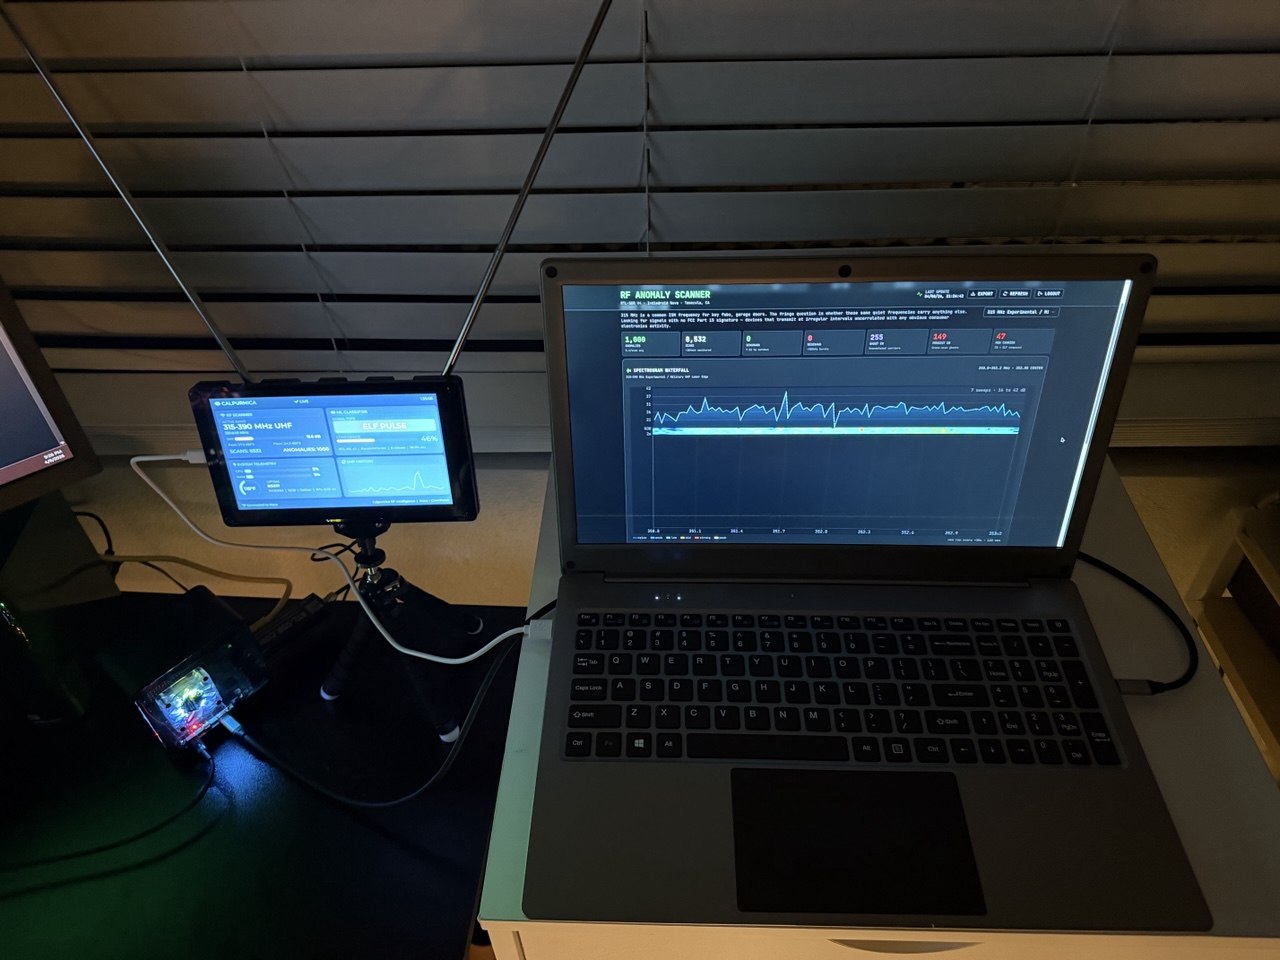
The complete cyberdeck setup: CrowView Note running the RF analysis dashboard with CrowPanel HMI for system telemetry
The Problem with Most Cyberdeck Builds
I've seen hundreds of cyberdeck builds on Reddit and Hackaday. They're impressive. Custom 3D-printed enclosures, hand-wired mechanical keyboards, Raspberry Pis crammed into Pelican cases. They look incredible in photos.
They're also completely impractical.
Most cyberdeck builds take weeks to complete. They require soldering skills, access to a 3D printer, and the patience to iterate on enclosure designs that never quite fit right. Once built, they're fragile. One bad bump and you're re-soldering connections or reprinting parts. And good luck making changes once everything's glued together.
I needed something different. I do RF security research, which means I need a portable workstation I can actually deploy in the field. It needs to boot fast, survive being tossed in a bag, and give me real-time visibility into what's happening in the spectrum. I don't have time to baby a custom enclosure or debug flaky connections.
So I built a cyberdeck that deploys in under 30 seconds. No soldering. No 3D printing. Just hardware that clicks together and works.
The Hardware Stack
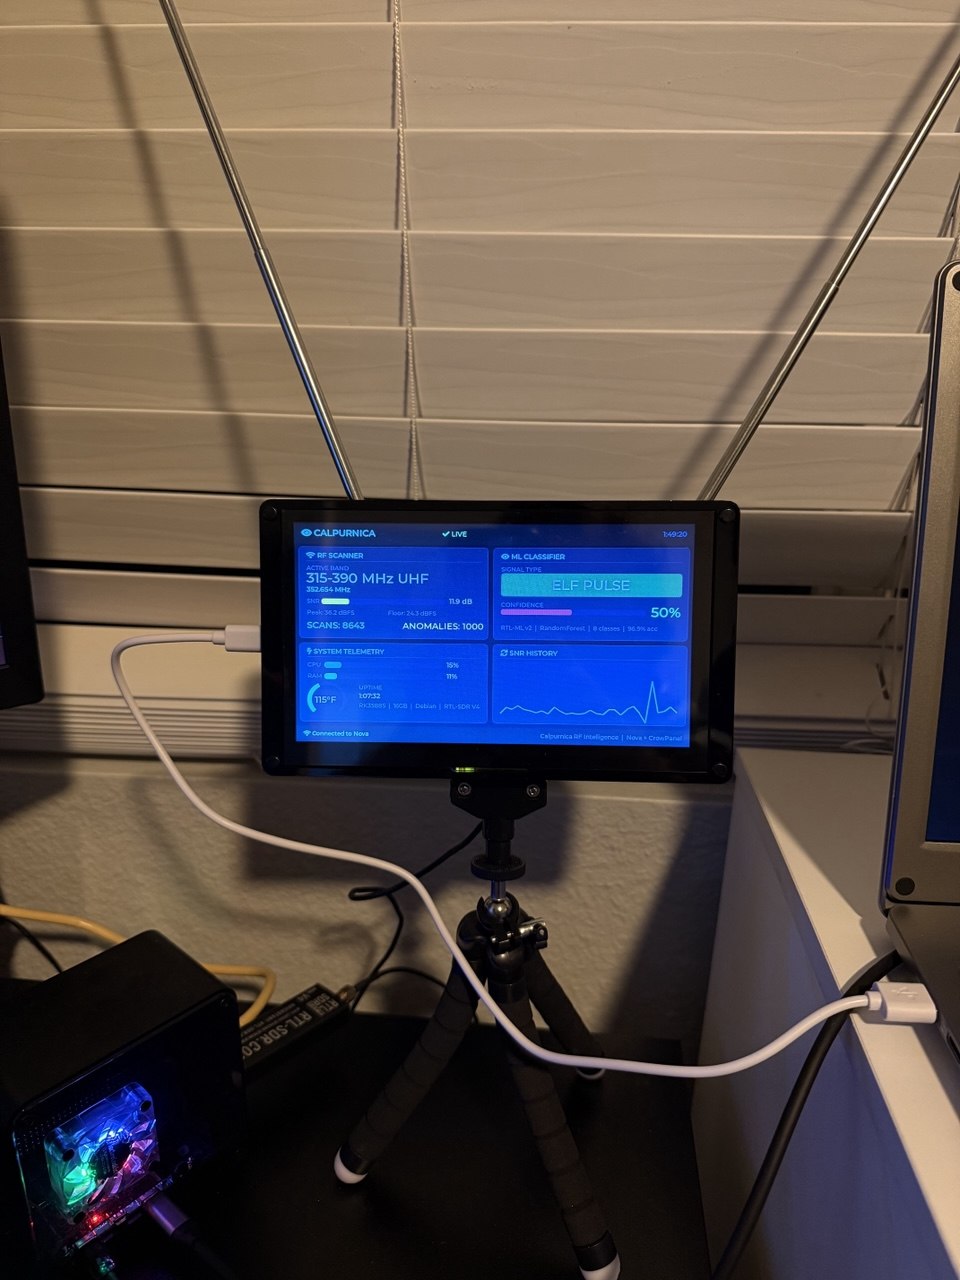
The full hardware stack: tripod-mounted CrowPanel and SDR antenna with minimal cabling
Here's what I'm running:
CrowView Note 15.6"
This is the core of the build. It's a portable monitor with a built-in keyboard, trackpad, speakers, and 6000mAh battery, all in a laptop form factor. But there's no computer inside. You bring your own brain. The 1920×1080 IPS display hits 100% sRGB, which matters when you're staring at spectrograms for hours. USB-C handles video, data, and power delivery (5V/5A), so a single cable connects everything. Price: $169.
CrowPanel 7" HMI
This is the secondary display. It's an ESP32-S3 with an 800×480 touchscreen built in. It runs independently on WiFi, polling the main system for stats and displaying them on a custom dashboard. I mounted it on the same tripod as the SDR antenna, which keeps the footprint small. It shows system telemetry at a glance without cluttering the main display. Think of it as the "air-gapped" status monitor, isolated from the analysis workflow. Price: ~$50-60.
Indiedroid Nova
The compute. Rockchip RK3588S with 4 Cortex-A76 cores at 2.4GHz plus 4 Cortex-A55 efficiency cores. 16GB of RAM. Runs Debian 12. This thing is overkill for most portable builds, but I'm running continuous RF scanning with ML classification, so the headroom matters. I covered the Nova's performance in depth in my RK3588 NPU benchmark article.
ℹ️SBC Compatibility
The CrowView Note works identically with Raspberry Pi 5, Jetson Nano, Orange Pi, or any other SBC with HDMI/USB-C output. I'm using the Nova because I need the extra horsepower for my specific workload. If you're following along with a Pi 5, everything in this guide applies exactly the same. Same cables, same setup, same result. Elecrow even sells dedicated bridge boards for Pi 5 and Jetson that eliminate cables entirely.
RTL-SDR Blog V4
Software-defined radio for RF spectrum capture. Plugs into the Nova via USB. The V4 uses the R828D tuner with better sensitivity and requires RTL-SDR Blog's custom librtlsdr fork (stock apt packages won't work). I built a complete AI-powered signal classifier using the RTL-SDR V4 and machine learning.
Total Build Cost
Physical Setup
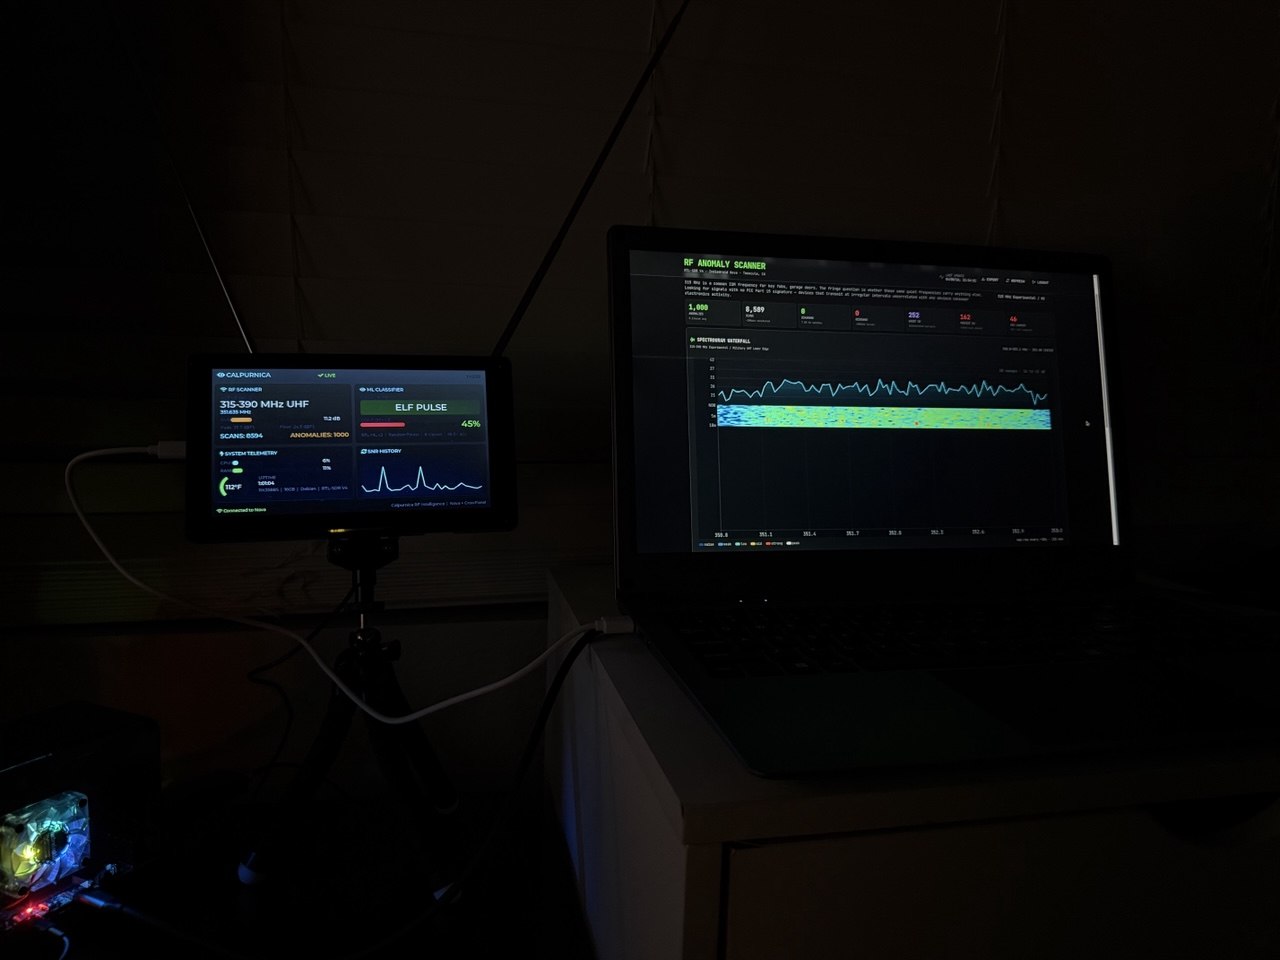
CrowView Note running the RF analysis dashboard
The CrowView Note connects to the Nova via USB-C. That single cable handles video output and provides power back to the Nova if needed. I'm using the Nova's USB-C port with DisplayPort Alt Mode, which the CrowView Note picks up automatically at 1080p/60Hz.
The CrowPanel sits on the same tripod as the RTL-SDR's dipole antenna. Compact setup, one less thing to carry. It connects to nothing physically. It joins the local WiFi network and polls the Nova for stats over HTTP every two seconds. No serial cables, no wired connection. If I need to reposition it, I just move the tripod.
The RTL-SDR V4 dongle plugs into one of the Nova's USB ports.
Cable management is minimal: one USB-C to the CrowView Note, one USB to the SDR, power to the Nova. That's it. The whole thing packs into a backpack.
What's Running on Screen
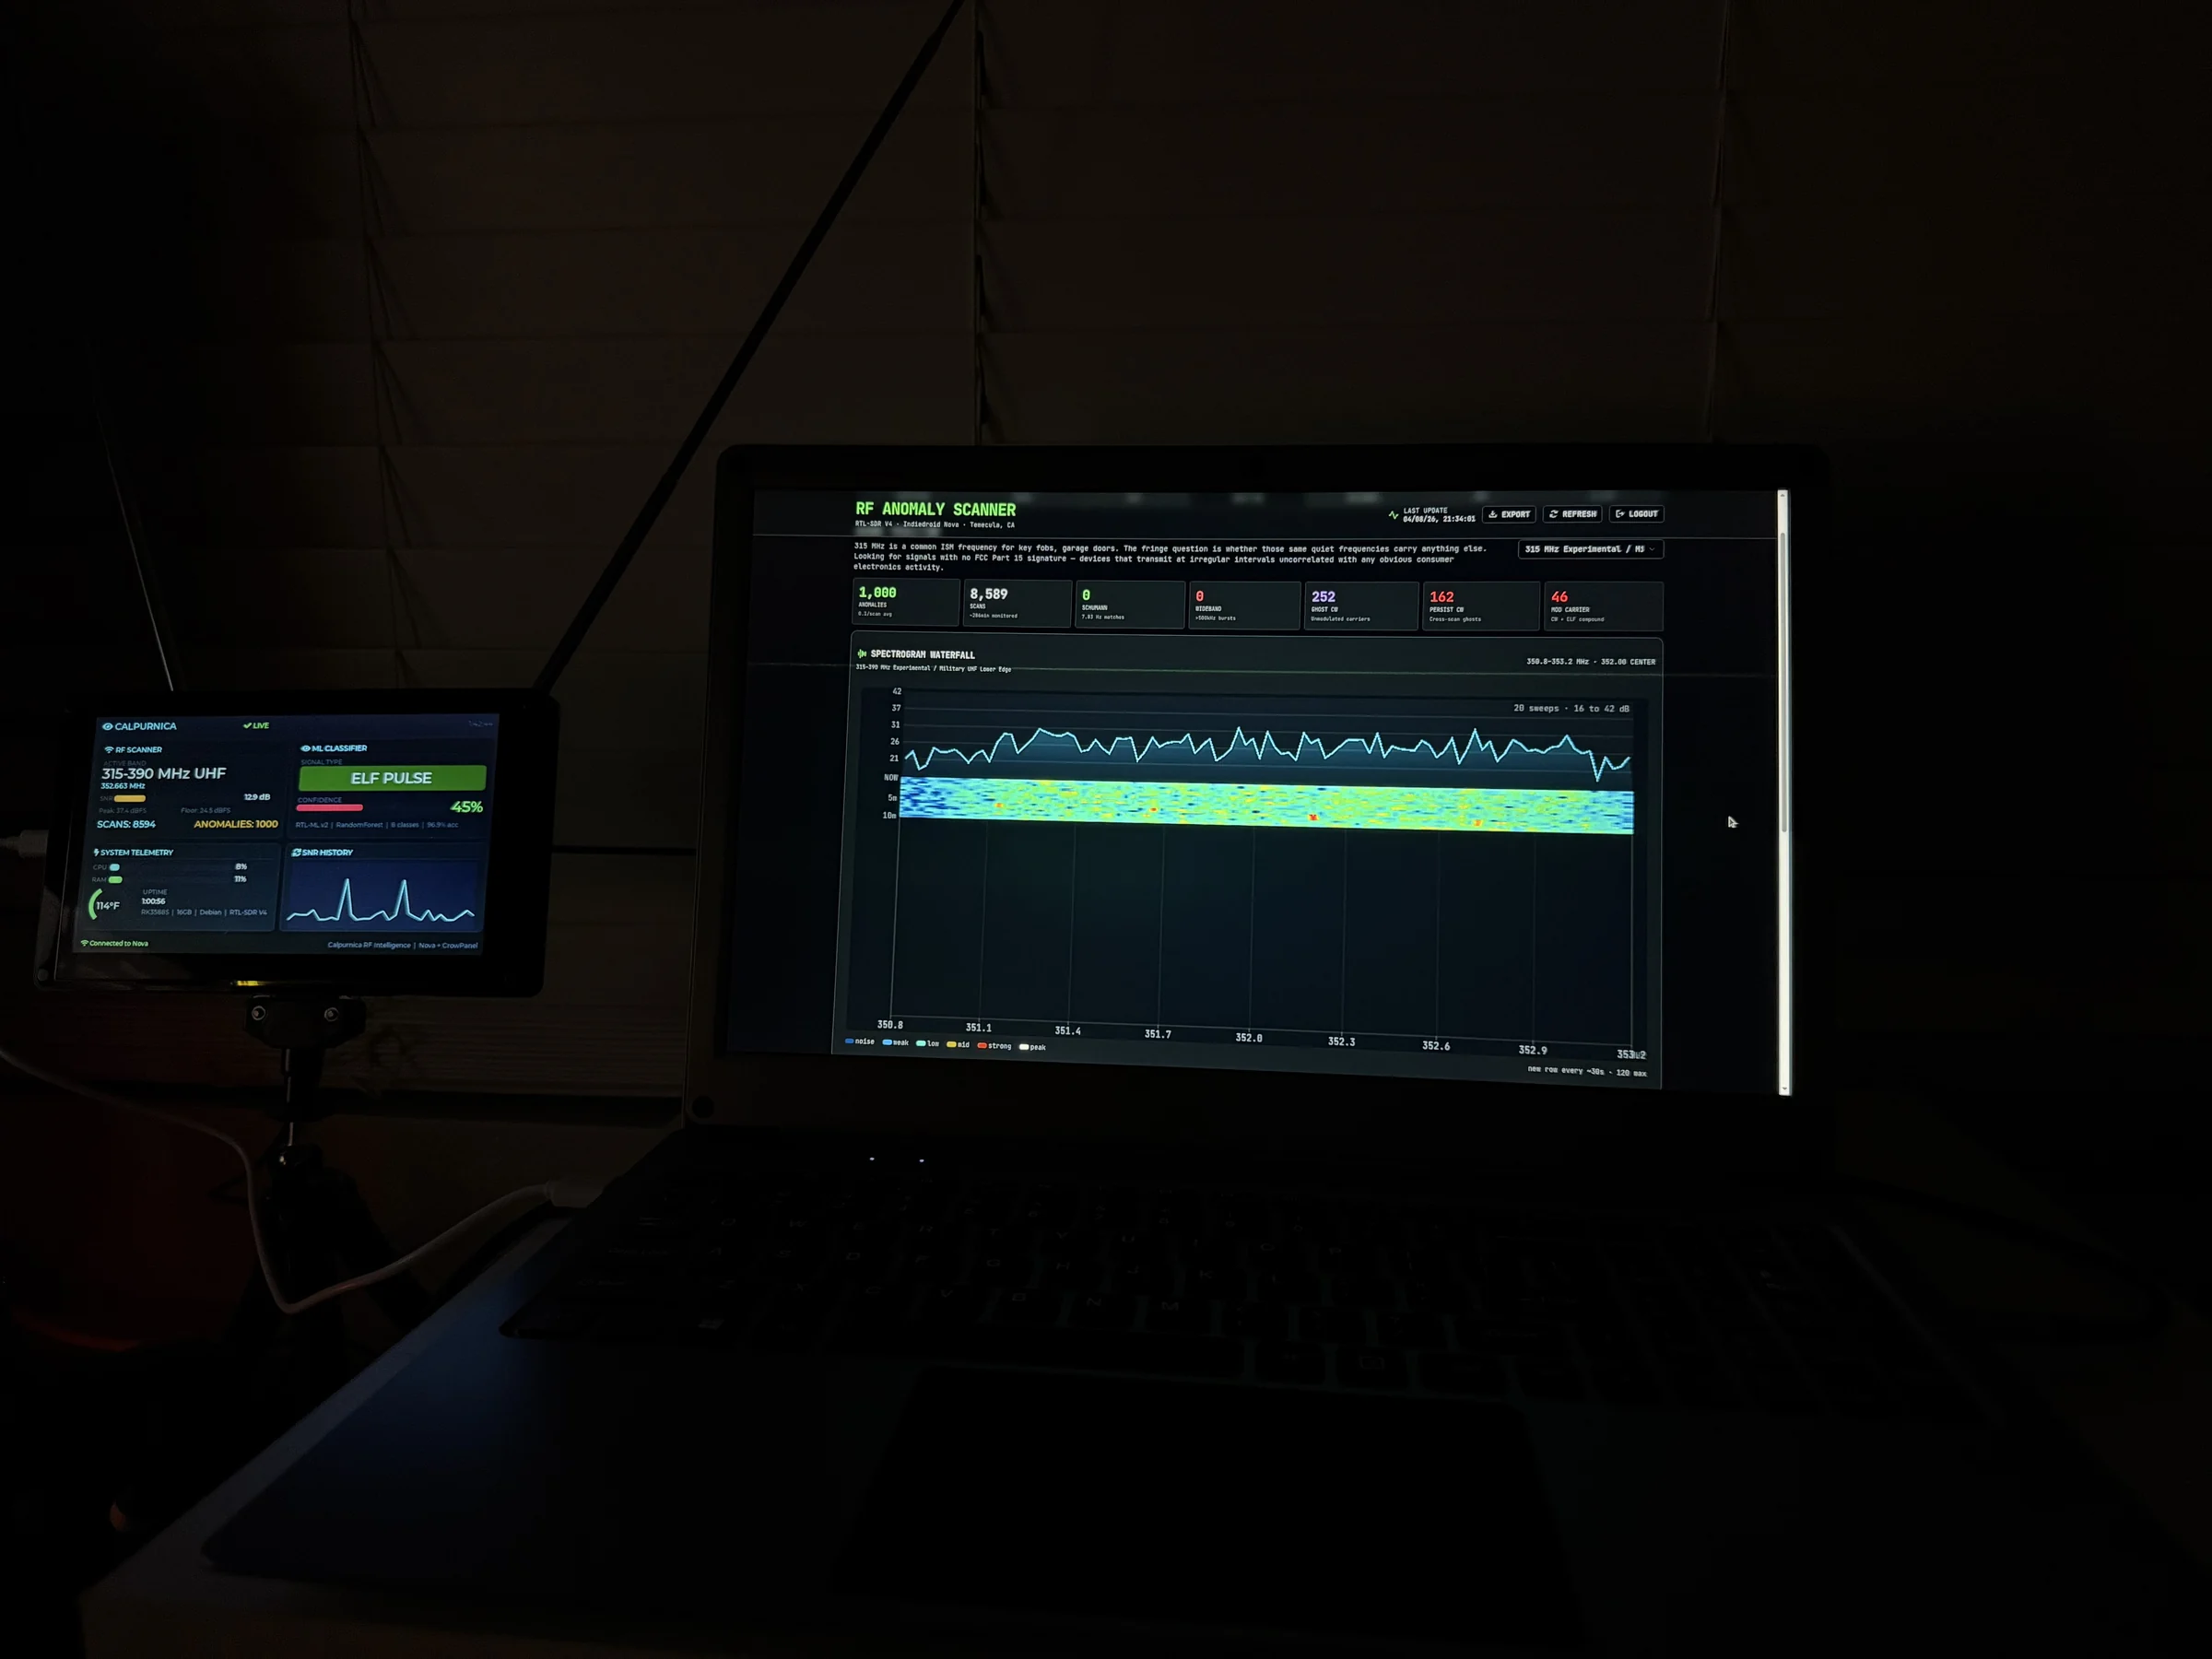
The CrowView Note displaying the main RF analysis dashboard: spectrogram waterfall, signal statistics, and band selector
The CrowView Note displays the main RF analysis dashboard. Here's what you're looking at:
Spectrogram Waterfall
Live visualization of RF activity across the current band. Time flows downward, frequency spreads horizontally, color indicates signal strength. The waterfall builds up over time, making it easy to spot intermittent signals or patterns.
Signal Statistics
Scan count, anomaly count, Schumann resonance matches, wideband bursts, ghost carriers, persistent CW detections. These counters increment in real-time as the scanner works through the band.
Band Selector
The system rotates through 11 frequency bands on a 24-hour schedule, but I can manually select a band for focused analysis. Current screenshot shows 315-390 MHz, the ISM band where key fobs, garage doors, and various industrial sensors operate.
The dashboard runs in Chromium kiosk mode directly on the Nova's Wayland desktop. Everything's self-hosted on the Nova itself. No cloud dependencies, no external servers.
The CrowPanel Dashboard
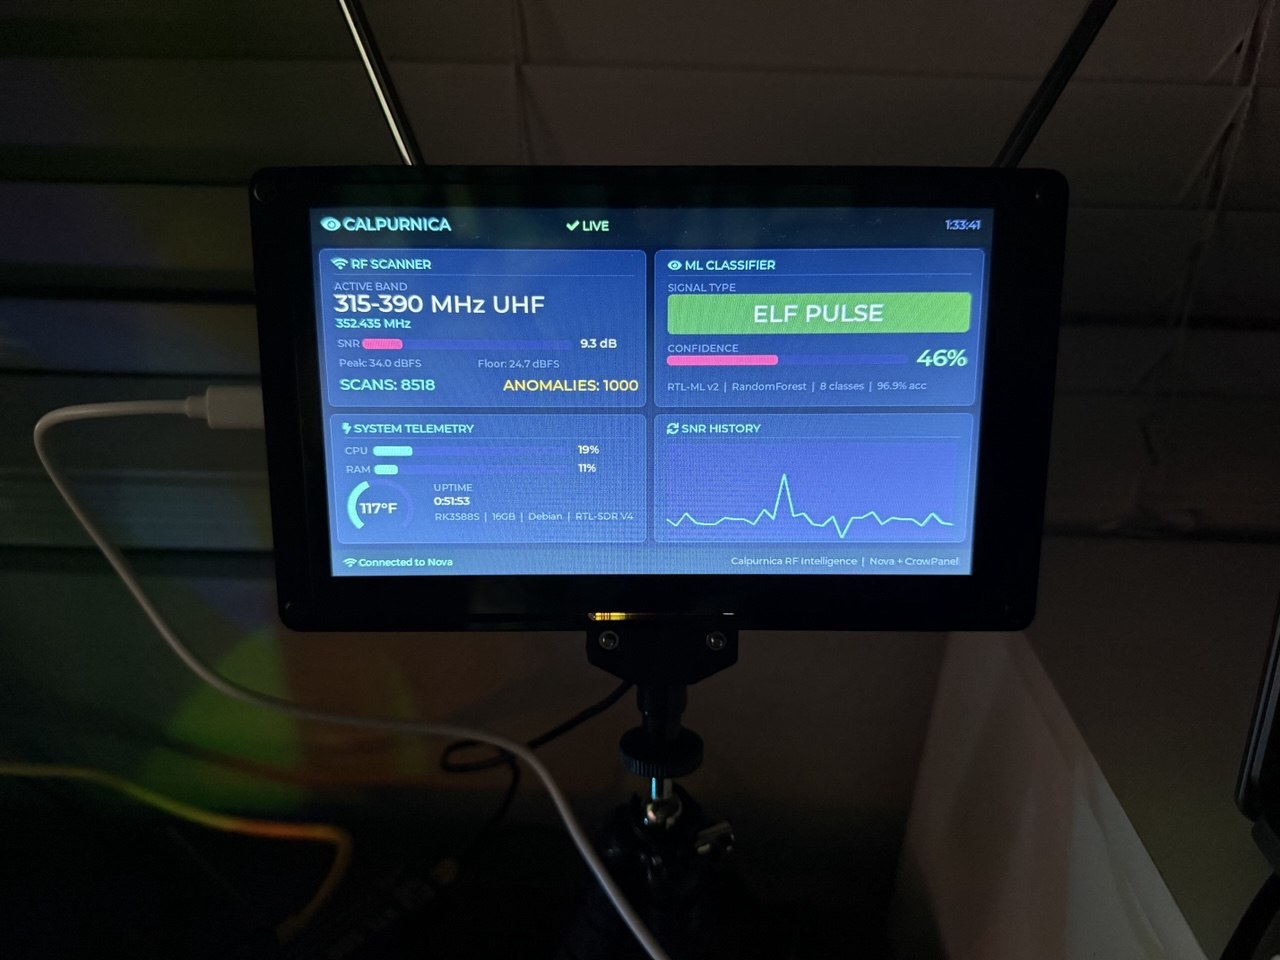
CrowPanel 7" HMI close-up showing RF scanner status, ML classifier output, system telemetry, and SNR history chart
The 7" CrowPanel runs custom firmware I wrote using LVGL for the UI and LovyanGFX for the display driver. It polls the Nova every 2 seconds and displays:
RF Scanner Status
- Active band (e.g., "315-390 MHz UHF")
- Current frequency
- SNR bar with color coding (green >20dB, amber >10dB, red <10dB)
- Scan count and anomaly count
ML Classifier Output
- Signal classification (ELF PULSE, CW ANOMALY, MODULATED CARRIER, etc.)
- Confidence percentage with visual bar
System Telemetry
- CPU utilization
- RAM usage
- Temperature (displayed in Fahrenheit with color-coded arc gauge)
- Uptime
SNR History
30-point line chart showing signal-to-noise ratio over the last minute. Auto-scrolling, so you can see trends at a glance.
The whole thing is designed to be readable from arm's length. Quick glance at the CrowPanel, back to the main screen.
The firmware and the bridge server that feeds it are both on GitHub (link at the end).
Why Two Displays?
I've been asked this a few times. Why not just put everything on the CrowView Note?
Two reasons:
Cognitive Separation
When I'm staring at a waterfall for an hour, I don't want system stats competing for screen space. The CrowPanel handles the "is everything okay?" question so the main display stays focused on the actual work.
Physical Independence
The CrowPanel runs on its own processor. If the main system hangs or I need to reboot, I still have visibility into what's happening. It's not truly air-gapped (it's on the same WiFi network) but it's operationally independent.
For field work, this matters. I've had analysis software lock up while capturing interesting signals. Having a separate display that keeps showing system status helps me make decisions about whether to wait, reboot, or kill specific processes.
Field Use Cases
This build isn't theoretical. Here's what I actually use it for:
RF Spectrum Monitoring
Sweeping bands for anomalies, logging signal patterns over time, identifying sources of interference. The 24-hour rotation through 11 bands gives me a longitudinal view of spectrum activity in an area.
Security Research
Testing wireless security systems, analyzing key fob signals, identifying rogue transmitters. The portability means I can set up anywhere.
Portable Development
When I need to write code away from my desk, the CrowView Note keyboard is surprisingly good. Not mechanical, but responsive enough for extended sessions.
Travel Setup
Fits in a backpack. I've taken this through airports without issues.
CrowView Note vs NexDock
If you're shopping for a lapdock, you've probably seen NexDock. Here's how they compare:
| Feature | CrowView Note 15.6" | NexDock 6 |
|---|---|---|
| Price | $169 | $229 |
| Screen | 15.6" 1080p IPS | 14" 1200p IPS |
| Focus | SBCs and makers | Samsung DeX and phones |
| Bridge Boards | Yes (Pi 5, Jetson Nano) | No |
| Battery | 6000mAh | 38Wh |
| Best For | Raspberry Pi, SBC projects | Phone-as-laptop users |
For reference, the UPERFECT X 15.6 Pro runs around $400 on sale, and their 4K model is $550+. CrowView Note undercuts all of them significantly.
NexDock is a solid product, but it's designed primarily for Samsung DeX users who want their phone to be a laptop. The CrowView Note is built for the maker community. Dedicated bridge boards for Pi and Jetson, better price point, and a design that assumes you're connecting an SBC rather than a phone.
If you're building a portable Pi workstation, CrowView Note is the better choice. If you want a laptop shell for your Galaxy phone, look at NexDock.
What's on GitHub
The full source code for this build is available at:
github.com/TrevTron/crowview-cyberdeck
Repository Contents
- CrowPanel firmware (
main.cpp,platformio.ini, LovyanGFX display driver) - Nova stats bridge server (Python, serves JSON to CrowPanel)
- Hardware parts list with links
- Wiring diagram
- Setup guide and troubleshooting docs
- High-res photos
The CrowPanel firmware uses LVGL 8.3 and requires PlatformIO to build. The stats bridge runs on Python 3 with psutil for system metrics. Both are well-commented and should be easy to adapt for your own builds.
Build It Yourself
Here's the parts list with links:
| Component | Price | Link |
|---|---|---|
| CrowView Note 15.6" | $169 | Elecrow |
| CrowPanel 7" HMI ESP32-S3 | ~$55 | Elecrow |
| Indiedroid Nova (or Pi 5) | $150-200 | AmeriDroid |
| RTL-SDR Blog V4 | $40 | rtl-sdr.com |
| USB-C Cable | $10 | Amazon |
| Tripod (antenna + CrowPanel) | $15 | Amazon |
Total: Under $500 for a field-ready RF monitoring cyberdeck.
💡Pi 5 Option
The Indiedroid Nova runs around $150 and gives you more horsepower than a Pi 5 at a similar price point. If you're more comfortable with the Raspberry Pi ecosystem, the CrowView Note includes a bridge board option that makes Pi 5 setup even cleaner. Either way works.
Final Thoughts
This is the cyberdeck I actually wanted. One that deploys fast, survives real use, and does actual work. No 3D printing. No soldering. No fragile custom enclosures that fall apart when you look at them wrong.
The CrowView Note is the foundation that makes this possible. At $169, it's cheaper than most portable monitors alone, and you get a keyboard, trackpad, battery, and speakers included. Add a CrowPanel for secondary status display, connect whatever SBC fits your use case, and you're done.
If you build one, tag me on LinkedIn or open an issue on the GitHub repo. I'd love to see what you do with it.
Repository: github.com/TrevTron/crowview-cyberdeck
Author: Trevor Unland | Security Researcher & RF Edge AI
Contact: unland.dev | GitHub | LinkedIn
Disclosure: Elecrow provided the CrowView Note and CrowPanel for this build. All opinions and analysis are my own.
Related Articles
Learn how I built an automatic radio signal classifier using machine learning and the same RTL-SDR V4 hardware featured in this cyberdeck build. Achieving 87.5% accuracy classifying real-world RF signals.
Complete benchmark comparison of the Indiedroid Nova RK3588 NPU (the brain of this cyberdeck) against Raspberry Pi 5 for running Llama 3 locally. See why the Nova delivers exceptional performance for portable AI workloads.
Get notified when I publish new hardware reviews, benchmarks, and security research. No spam, unsubscribe anytime.
Email goes to Buttondown for the newsletter. Unsubscribe anytime. Privacy details.